How To Set Up A Saltwater Aquarium With Live Rock
Saltwater fish keeping is a great hobby and entertaining. Starting out with the correct equipment and information is essential to ensure your success.
- Choose Your Aquarium – Start with an aquarium of at least 29 gallons. The larger the aquarium the more stable the environment.
- Placing The Aquarium – Choose a location that is out of direct sunlight and away from heating or cooling ducts as well as doorways leading to the outside. Make certain you have an electrical outlet near the aquarium. Finally, choose a room where you spend a lot of time and where you can sit down and enjoy your aquarium.
- Leveling Your Aquarium – Use a beam level to level your aquarium. Use shims under the stand at floor level. Once shims are placed under the stand and the tank reads level you are ready to begin filling your aquarium.
- Preparing The Aquarium – Using a soft cloth or damp paper towel, wipe down the inside of the aquarium to remove dirt and dust. NEVER use soap or household cleaning agents in or on your aquarium.
- Adding Background – The background is attached to the outside back of the aquarium to hide the filter and electrical cords. It adds depth to your tank and creates a pleasing setting.
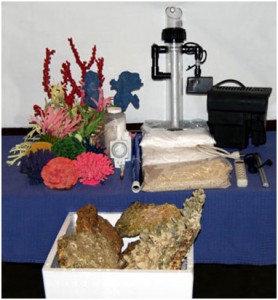
- Adding Filtration – There are several types of filters that can be used with a saltwater live rock with fish aquarium. The most commonly used is a power filter that hangs on the back of the aquarium. Since power filters are the most common and inexpensive filters used we will use a power filter in these steps. If you are using another type of filter, please follow the manufacturer’s directions. Each brand of power filter is slightly different but here are general procedures: Hang the filter on the back of the aquarium. Place the intake tube into the designated slot and place filter media in according manufacturer’s instructions. Do not plug the filter in at this time.
- Install Protein Skimmer – Protein skimmers physically remove dissolved organic compounds and other substances from aquarium water. Place the hang-on protein skimmer on the opposite side of the aquarium from the power filter. Do not plug it in at this time!
- Install a Power Strip – It is always a safe idea to mount a power strip under the cabinet. Laying a power strip on the floor behind an aquarium stand is risky as there is then the chance that water could spill on it.
- Adding Live Rock – Live rock is, as its name suggests, rock with living organisms attached to it. Use 1 to 2 pounds of “cured” live rock per gallon of aquarium water. Stack rock in a sturdy fashion, yet loosely enough to keep water flowing through it. Leave ½ to ¾ of your substrate open (without rock covering it) to allow healthy water changes.
- Adding Substrate – Aragonite is a beneficial substrate that slowly dissolves and releases buffers to help keep the pH at an ideal level. Add enough substrate to create a 1″ thick layer. Pour aragonite into an open spot on the floor of the aquarium. Then spread it evenly on the bottom of the aquarium.
- The Heater – Use a submersible heaters which allows you to set to a specific temperature. Follow the manufacturer’s instructions to set and attach your heater. Do not plug the heater in at this point. Set the temperature between 80° and 82°F for the first 4 to 6 weeks (until a biological foundation is established.) Once your aquarium is cycled set the temperature to between 74° and 78°F. Add a thermometer to your aquarium to ensure heater is working properly.
- The Power head – Power heads help circulate water and increase the current in the aquarium. They keep water flowing through the live rock. Follow the manufacturer’s instructions to attach the power head to your aquarium.
- Adding Water – Most pet and aquarium stores sell a purified premixed saltwater. To ensure your salt level is correct use a hydrometer to test specific gravity and make sure it reads between 1.020 and 1.024. Now add a water conditioner. Test pH and make sure it is between 8.0 and 8.4. Pour water slowly onto one of the live rocks close to the bottom of the aquarium. Fill the aquarium until the water level is just above the bottom of the aquarium’s frame.
- Starting The Equipment – Using a hang on power filter fill the filter compartment with at least a half a cup of water. Plug the filter into an electrical outlet. Water will be drawn up the intake tube and spill back into the aquarium. Now plug in the protein skimmer and the heater.
- Placing The Top and Light – Place the strip light on the glass tops, plug it in and turn on the light. The lights should stay on between 6 to 10 hours each day.
At this point your aquarium is completely setup. Now is the time to learn a little about water quality before you run out and pick up some fish.